|
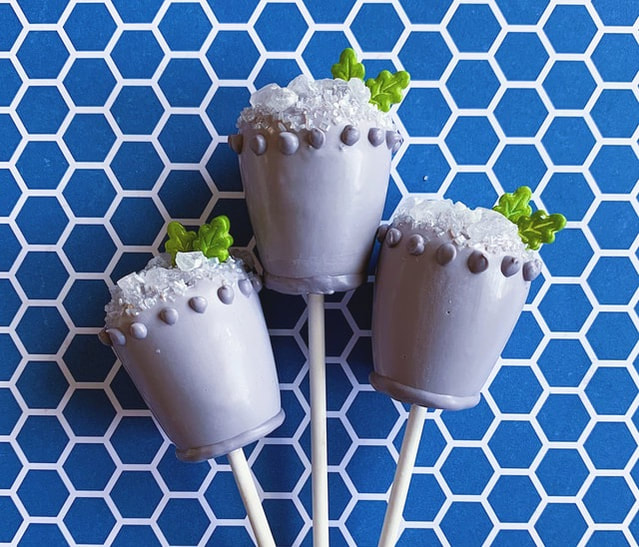
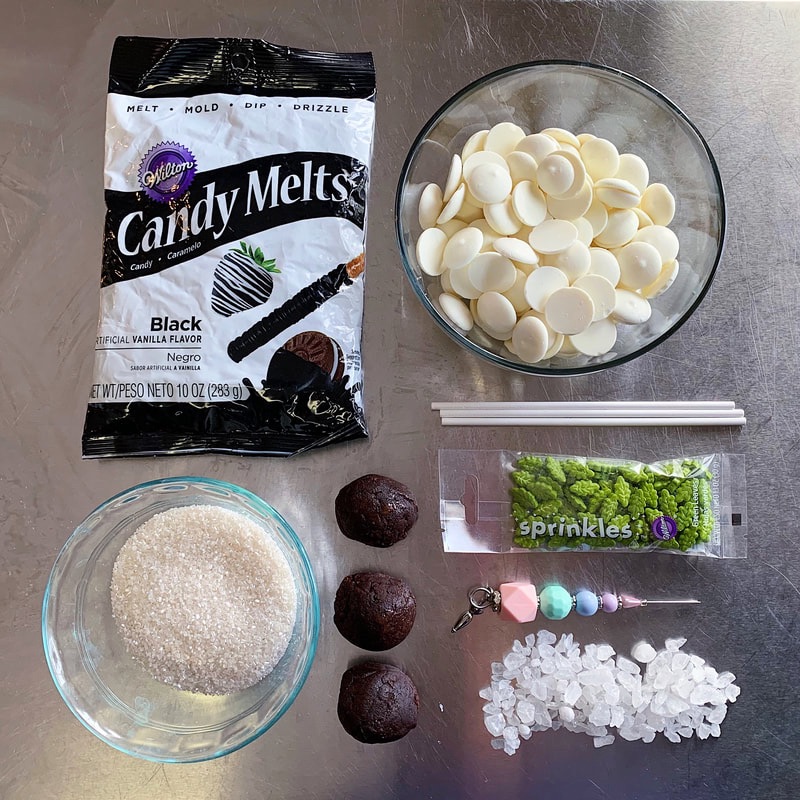
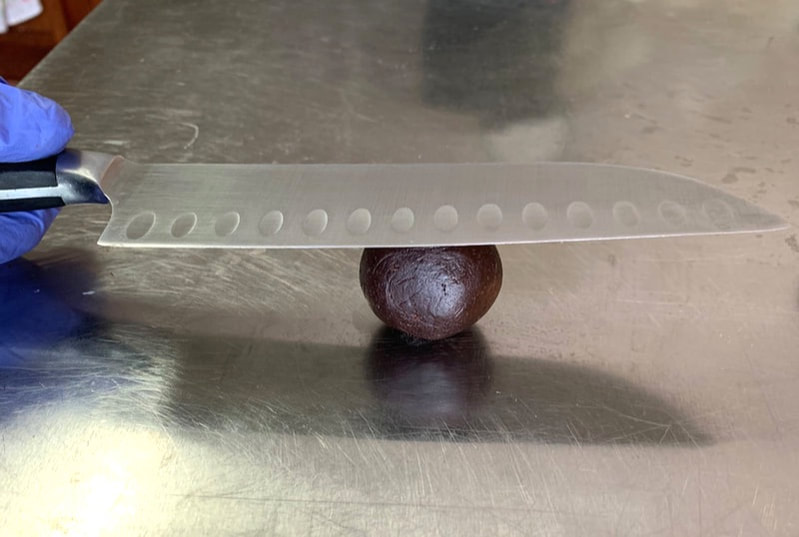
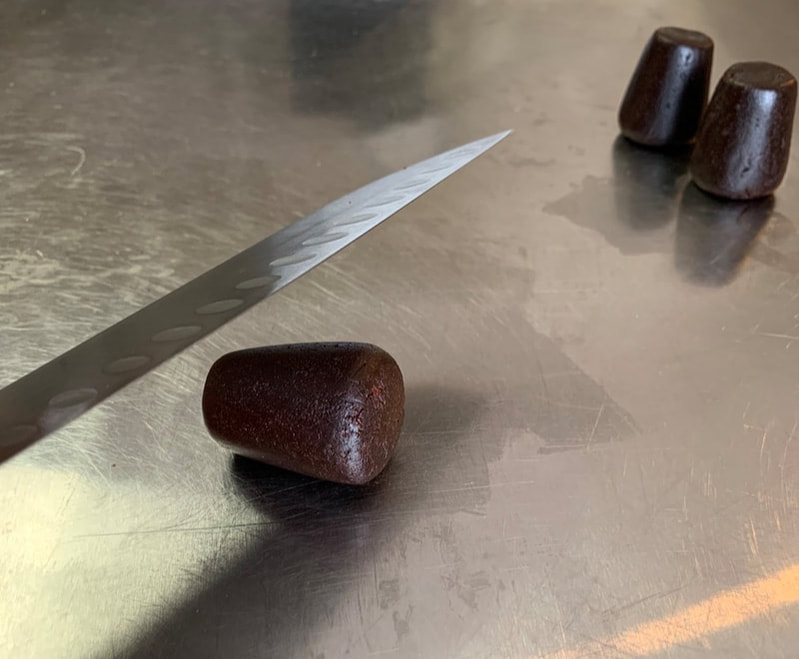
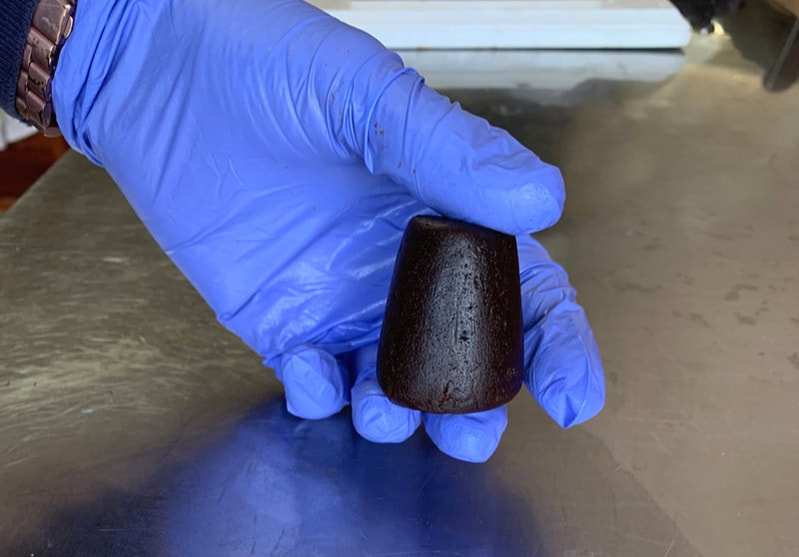
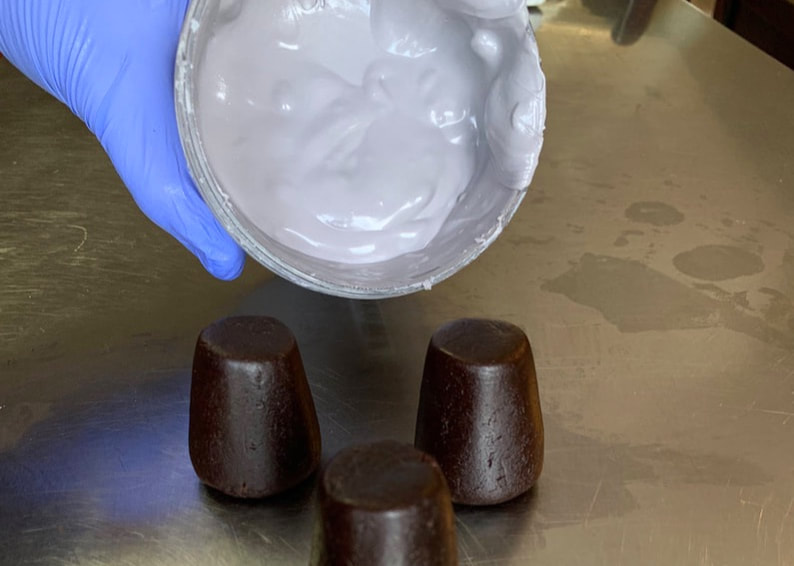
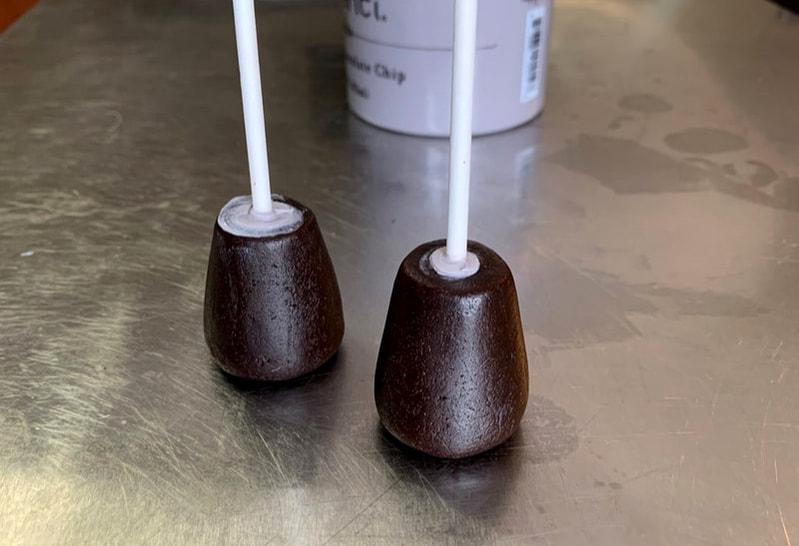
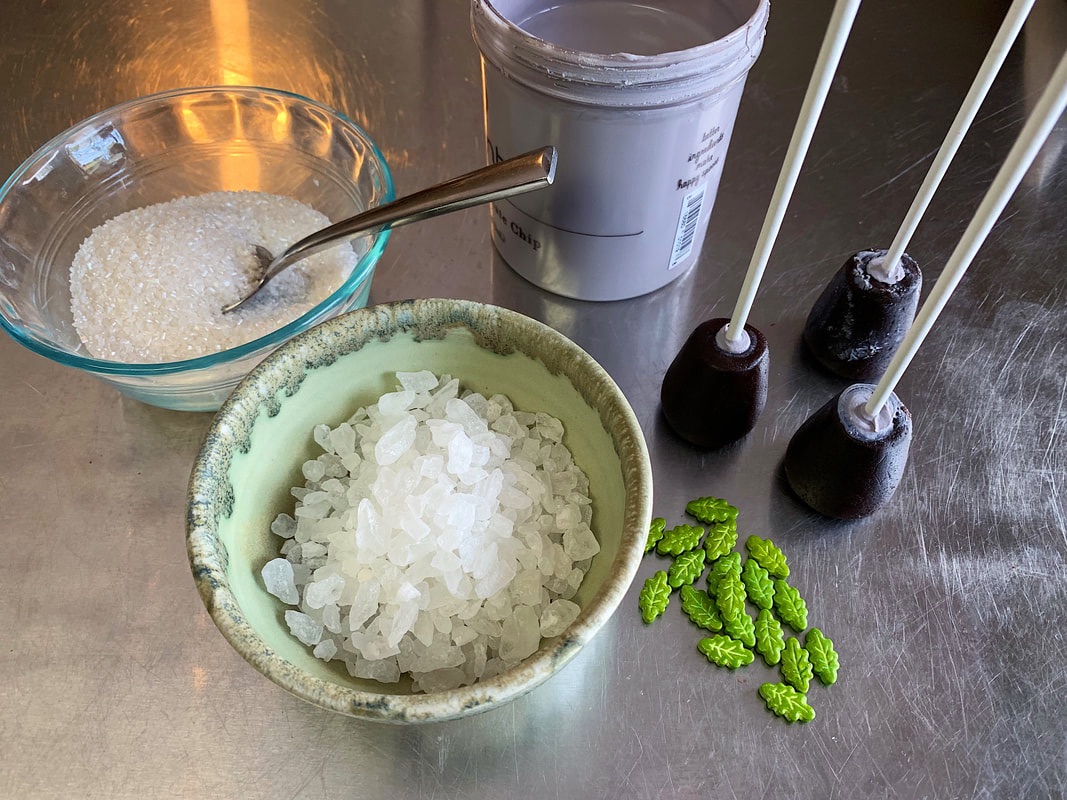
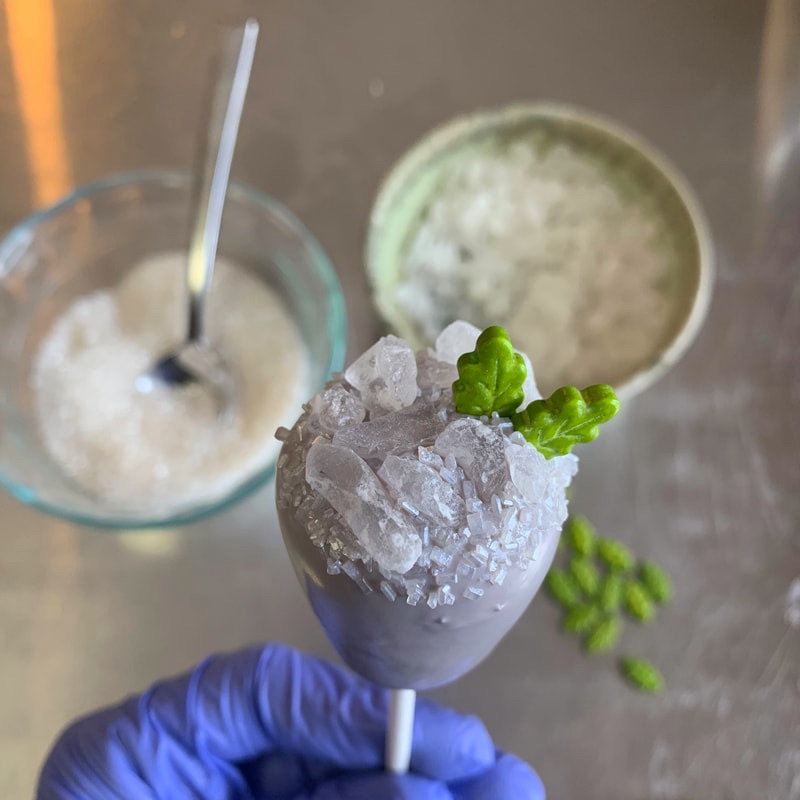
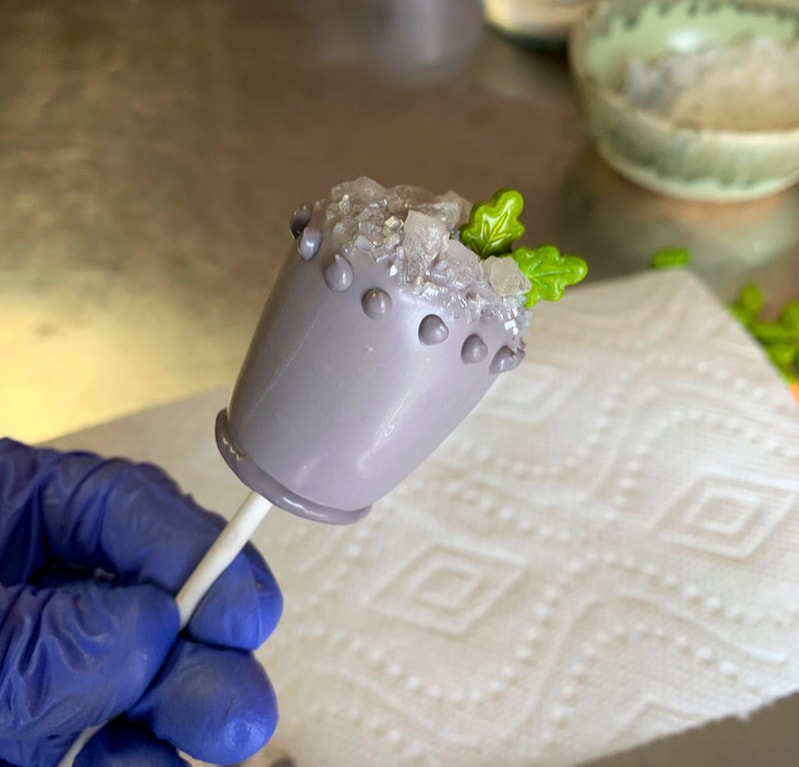
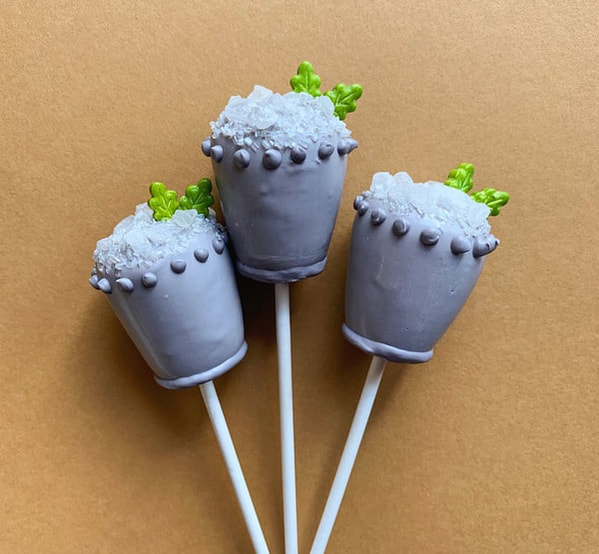
The 145th Kentucky Derby will be this Saturday. This "Run for the Roses" earned its nickname for the blanket of roses draped over the winning horse. The event is held annually on the first Saturday in May, and with it there are several traditions observed. Spectators dress super-fancy (not really my thing...anyone who has seen the 4 dresses in my closet, or my 3-year-old "nice jeans" would guess this), gather en masse (also not my thing, as an introvert) at Churchill Downs Racetrack, place bets (again, not my thing as a non-risktaker) on the performance of horses groomed specifically for this "Greatest Two Minutes in Sports," while they enjoy traditional "Derby Day" food and drink, such as the Mint Julep, a cocktail of bourbon, sugar, and mint (something I can get excited about! Yes!). However, more exciting to me than a sweet, minty alcoholic drink is a tiny drink-shaped cake pop. Everyone at the party can enjoy them: even the Designated Driver ;) A mint julep is traditionally served in a silver "Julep cup." I decided to make my little mint julep cake pops with grey chocolate coating, instead of painted silver. However, if you'd like a metallic silver finish on your cake pops, I recommend creating an edible paint by mixing Nu Super Silver Edible Luster Dust with lemon extract or Everclear (grain alcohol) or use Edible Art's Metallic Silver Edible Art Paint. Wait until your cake pop's chocolate coating is fully cooled and hardened before applying the paint. This tutorial assumes that you already know how to make cake balls or cake pops. If you are new to cake pop-making, I highly recommend Bakerella's book Cake Pops. It's what I used to teach myself when I first started making cake pops in 2011. Make a few rounds of standard cake pops before you start getting all "Derby fancy" with these! To make these Mint Julep cake pops, you'll need the following: Ingredients and Supplies *Cake Balls, in your choice of flavor(s) *White candy coating, such as Mercken's Super White melting wafers *Black candy coating, such as Wilton's Black candy melts *Leaf-shaped sprinkles, such as these from Wilton *Rock candy, such as these from Hoosier Hill Farm *Sugar crystals, such as these from CK Products *Piping bag *Lollipop sticks *Chef's knife (for sculpting) *Scribe (the "pointy thing" used for popping air bubbles). Mine is from Scribes by Vivid Sister *Paramount Crystals (optional) to thin chocolate, if needed Start by rolling each cake ball into a cup shape. I use chef's knife to roll the cake ball back and forth to start forming a cylinder. As the cylinder starts to take shape, I slant the knife (by dropping one edge of the blade) to manipulate the cylinder in such as way as to make a tapered cup shape. Note the slant of the knife blade to match the slope of the cup shape. Once all of the cake balls are shaped into tiny cups, mix and melt the black and white candy melts. Start with mostly white candy melts, and add just a few black chips to the mix. It is much easier to add black chips to make the grey darker than it will be to add white chips to make it lighter. I use a microwave to melt the candy coating. Place the chips in a glass or plastic jar, then microwave 30 seconds at a time at 50% power. Stir between each heating session until the melted chocolate is smooth and "runny enough for dipping." Be careful to avoid overheating, as that will cause the chocolate to harden irreparably. If you find that the chocolate is too stiff (and you know that you haven't overheated it), try adding some Paramount Crystals to thin it, and make it easier for dipping and coating. To better secure the cake pops to their sticks, I recommend first attaching the lollipop sticks by dipping them in the melting chocolate before inserting each stick into a cake ball. Allow the chocolate on the stick to cool/harden before dipping the cake ball into the jar of melted chocolate. Once all the cake pops are ready for dipping, prepare your toppings. I recommend putting the rock candy and sugar crystals in small bowls, for easier access (and neater sprinkling!). Dip the cake pop into the melted chocolate. Tap off the excess chocolate, and use the scribe to pop any air bubbles present on the chocolate coating. Then, working very quickly (if you are too slow, the chocolate will harden before you finish adding all the details), place 2 "mint leaves" on the top edge of the cup, and rock candy to fill most of the surface (to resemble ice cubes). Finally, sprinkle sugar crystals to fill any remaining space, and to add extra sparkle. Once the chocolate coating has fully-cooled/hardened on the cake pop, fill a piping bag with some of the melted grey chocolate from the jar. Use that to pipe dots around the rim, and a line around the base, to mimic the style of a traditional julep cup. Once the piped details have cooled/hardened, you can add the edible metallic silver paint, or just leave as-is. If you're feeling super fancy (and bold), you can remove the stick to create a tiny cake ball/cup. Be mindful that removing the stick may cause the cake pop to crack. If you want to try it, I recommend carefully and slowly twisting the stick it while you pull it away from the cake ball/cup. After the stick has been removed, fill the hole with piped chocolate, then rest on wax paper to cool. If you use this tutorial to make your own Mint Julep cake pops, please share your feedback and photos! Tag Sweet Whimsy Shop on Instagram or Facebook as @SweetWhimsyShop
Many thanks in advance, and happy creating!!
1 Comment
|
AboutLooking for more from Sweet Whimsy? Find DIYs, behind-the-scenes, and more right here! Whimsically sporadic posting guaranteed. Archives
May 2019
Categories
All
|
 RSS Feed