- Tutorials
- >
- Tiny (elf-sized) Cake Pop Box Tutorial
Tiny (elf-sized) Cake Pop Box Tutorial
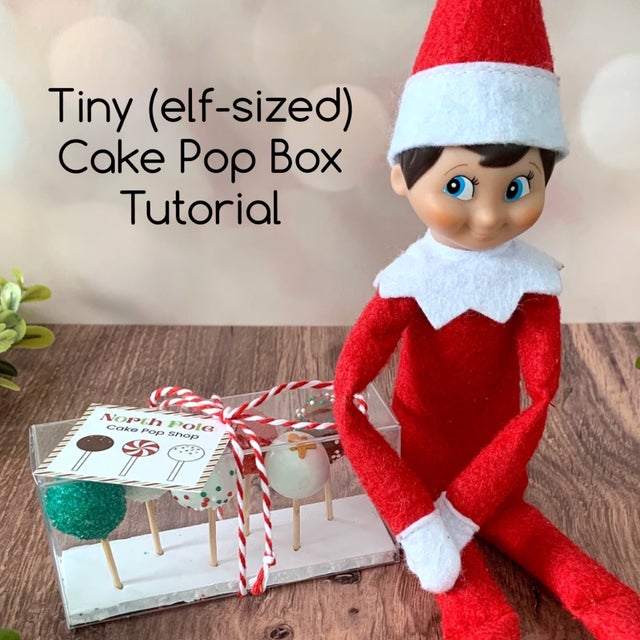
This is a step-by-step video tutorial demonstrating how to make the Tiny (elf-sized) Cake Pop Box set, as shown in the photos.
I spent many hours over several days (after weeks of envisioning this idea in my head!) troubleshooting and problem-solving to construct the perfect "elf-sized" box of cake pops. In this tutorial, I'm sharing everything I've learned so that you can recreate the same boxed set in about 30 minutes...instead of 30 hours ;)
This tutorial is best for someone who has made cake pops or cake balls before. This is not an "Intro to Cake Pops" tutorial. Some cake pop "basics" will be covered in this video, but those skills are not the primary content.
In this tutorial, you'll learn:
*How to measure & prepare a stand for the cake pop box
*How to make the sticks for the tiny cake pops
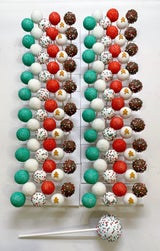
*Exact measurements for the cake balls, to be sure they fit inside the box
*Tips to prevent cracks in your cake pops
*How to recreate the display exactly as shown in the photos
*Sources for all the materials and supplies needed
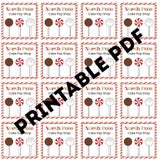
You'll also receive a PDF printable of the "North Pole Cake Pop Shop" tags used on the boxes.
Additionally, you will receive a supply list with hyperlinks to purchase needed supplies. The supply list will include a template to use for creating the cake pop stand/base for the box, as well as a template for cutting the cake pop sticks to size.
***Be sure to print the Supply List / Template page at 100% (Full Size). Some printers will automatically reduce the size of the page before printing, and you may need to override that and "Print Full Size" or "Print at 100%" to ensure the correct size is printed. You can confirm that you have printed the correct size paper by cutting the template for the box base (where you'll later insert the cake pops), and sliding it into the clear box. The rectangle should fit perfectly inside the box, with barely any space on any side ***
The information provided in this tutorial is confidential, for use only by you, the purchaser. Certainly, you can reproduce the finished cake pops / product(s) for your own use, including for sale at whatever price you choose. However, sharing techniques, recipes (if included), or any other content covered in the tutorial is strictly prohibited. Do not "reteach" the techniques. Do not share the supply list or the links within it. Do not discuss, or ask questions about, the techniques shown with anyone other than Becca Aronowitz, the creator. This includes engagement in forums such as Facebook groups, as well as posting work-in-progress, behind-the-scenes, and similar "DIY-style" content on social media platforms like Instagram, Facebook, TikTok, YouTube, and Twitter.
To be clear: you can post videos, pictures, etc of your finished product(s), but do not show the creation of the product(s) or share the resources included in the supply list.
Your purchase of this tutorial serves as an agreement to the terms above.
Immediately after purchase, you'll receive an email with links to all the digital content. For that reason, no refunds can be offered.
There are 2 versions of the same video tutorial. The "Large Format" version is about 1.6GB, and the "Small Format" version is about 740MB. The smaller version is great for viewing on smartphones, but may show as low-quality on larger screens (like computers). The larger version will show clear on bigger screens, but will take longer to download. If you encounter an issue with downloading and/or viewing, be sure you have followed the directions below, checked your internet strength & speed, and if all else fails, restart your device and try downloading again direct from your email.
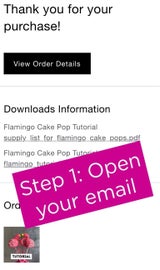
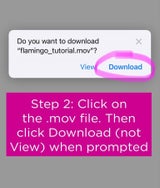
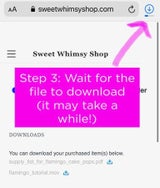
For the best use experience, this video should be opened and downloaded using a computer. However, it can still be accessed and viewed on a mobile device or tablet. For iPhone users specifically, PLEASE click through the step-by-step images within the description photos for instructions for viewing. Some of the newer/updated iPhones will show the download icon & list on the top left side of the Safari screen, instead of the top right side, as shown here (in the slide labeled "Step 3").
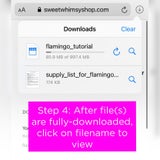
IPHONE USERS, PLEASE READ: For photo instructions on how to view this video on an iPhone, please click through the step-by-step images within the description photos (directions are in the pink boxes within the screenshot photos). For the best user experience, this video should be opened and downloaded using a computer. Viewing on an iPhone is possible, but you need to follow these steps:
- Open your email
- Click on the .mov file. Then click "Download" (do not click "View" if you're trying to watch the video using an iPhone)
- Wait for the file to download. It may take a few minutes. Please make note of the screenshot showing how "downloading" might look on your iPhone
- After the file is fully-downloaded, click on the file name to view/watch. Some of the newer/updated iPhones will show the download icon & list on the top left side of the Safari screen, instead of the top right side, as shown here (in the slide labeled "Step 3").
